
按流行标签浏览免费 画笔 矢量、剪贴画和插图
ACworks是一家基于专业约稿,与大众创作者投稿相结合的方式提供免费素材下载的公司。得益于这种素材来源的独特属性,在当前的illustAC - 书法 这一类别页面中,您将能找到与其他素材图库风格不尽相同的内容。
本文将通过以下几个角度,对illustAC中的书法素材作出全面的介绍。
- 素材的内容构成
- 类素材的类型
- 素材的搜寻
- 素材的编辑
- 素材的使用目的/许可范围
1. 免费书法素材的内容构成
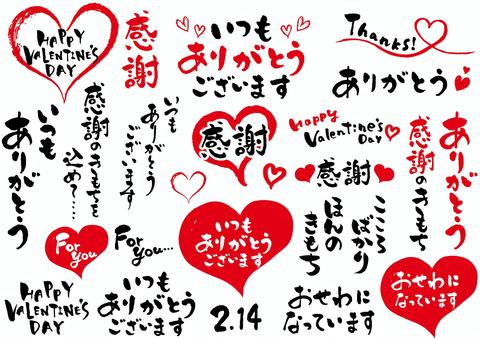
- 日式书法
- 水墨风格的艺术设计
- 介于字与画之间的象形文字
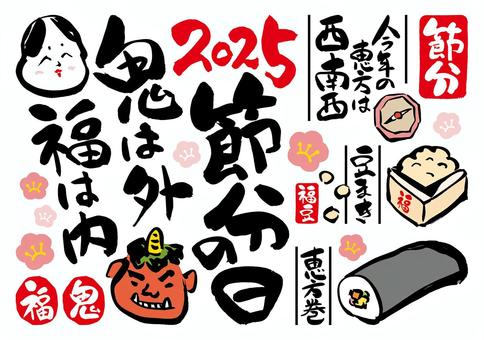
说到书法,自然不得不提日本的文字。日本的文字主要由汉字与假名构成。对于中国人来说,汉字一边还算好认,毕竟如果不是学者,一般人还真的很难分辨出日语汉字与正体中文汉字的差别;但对于假名来说,可能能看懂”の”的助词用法就是极限了。而万幸的是,由于同处东家文化圈,传统节日方面有较高的相似度,因而即便是日语,台湾设计师也能从中淘到不少有价值的素材。典型的例子就是作为新年贺词的“谨贺新年”,亦或是传统爱情节日“七夕(尽管意思不太一样)”。总之,如果设计师想找一些带有强烈日式传统风格但同时又有较高辨识度的免费插图素材的话,那么书法类别就是您的不二之选。
当然,在illustAC的书法类别中,不一定所有内容都与文字有关。占据半壁江山的还有另一类插图:水墨风素材。它们既可以是以具体的形象出现(例如生肖的形象),也可能作为装饰性的素材(例如边框)显现。尽管未书一字,观众也能从改风格中感受到强烈的文化底蕴。这大概就是东亚文化圈独有的条件反射吧。
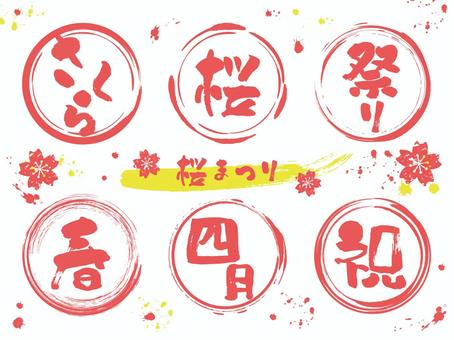
而更有什者,创作者将上述两种类型的素材进行了融合,创作出了第三种象形文字。这里说的创作文字,并非完全从零开始的原创,而是指在不改变文字原本属性的基础上,结合文字意思对笔划进行变形,从而使其看起来更像一幅画的设计方式。举例来说,将祝福的“祝”字拟人化成手挽手的新人,亦或是将羁绊的“绊”字表现为绵长的丝带,这类设计都可以说是其中的典范。
为了获得更多精彩的书法类别的免版税插图/向量图,就要等您亲自搜寻啦!
2. 免费书法素材的类型
按使用目的进行区分的话,illustAC中的书法素材大体可分为2类:元素图和背景图/边框。
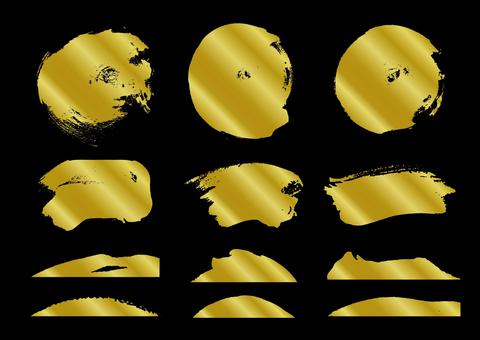
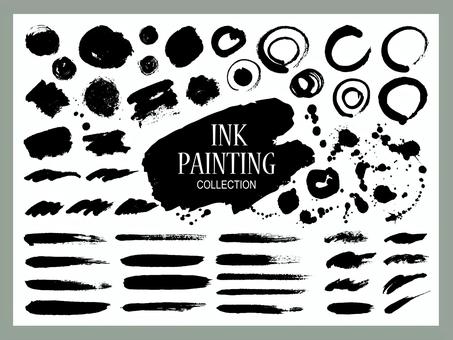
所谓元素图,其实就是揉合了一揽子同主题同风格图片的素材。归功于AI或是EPS等向量图档的存储方式,这些图片能够在实际使用时被拆分成单独的元素加以运用。同时,由于使用者在处理此类素材时经常只取其中一小部份加以运用,因而也不容易与他人的设计撞车。可以说此类图片是在专业设计师手中灵活度最高,用起来最方便的一种类型了。相比于其他类别,书法类别中的元素图通常会以笔划或圆环的方式出现。相比于工整且有规则的几何图形,这些笔划构成的线更多带有一分豪迈和厚重。
说到背景图,则是被用于简报的背景图案的素材的统称。很多人都认为内容才是简报的核心,设计什么的只是装饰。这种想法是不客观的:因为简报的价值不在传出讯息,而在于帮助人接受讯息。一份配图合理的简报要远比一份白纸黑字的版本更能长时间保持听众的注意力,从而实现更多的资讯传递。而设计,正是关乎这一过程效率的法宝。尽管数量较少,但您能找到的基本都是高质量的水墨画。如果您想加强简报的文化质感,那么此类水墨风格的素材就是您不容错过的内容。
3. 免费书法素材的搜寻
在illustAC中,您可以使用多种方法快速找到您需求的免费书法插图/向量图。
- 按关键词搜寻书法
- 调整符合条件的素材的表示顺序
- 排除关键字搜寻
- 按颜色搜寻
- 按人数搜寻
- 寻找类似书法素材
按关键词搜寻
按关键词搜寻可以说是任何图库(除了templateAC)都具备的搜寻功能了。在illustAC中,搜寻的对象是所有书法插图/向量图下的所有标签!由于创作者在投稿时一般都会为向量图中的内容添加注释(标签),因此这种搜寻方式可以经典的囊括大部分免费向量图,并将含有检索关键字/词的素材按照向量图的使用频度进行排列。如果您不想使用默认的热度排序,可以尝试下一项搜寻功能。
调整符合条件的素材的表示顺序
同样是由于接受一般使用者的投稿所导致的特性,illustAC的免费插图/向量图素材在质量上可能会有较大的浮动。因此,通常情况下,我们默认选择按插图/向量图的被使用频率向您呈现搜寻结果。但如果您希望获得最新的素材,我们也有为您准备相关的功能。只要勾选页面侧边的精致化搜寻栏中的【排序方式】-【最新】,即可获得创作者上传的第一手素材!
排除关键字搜寻
为了最大限度向您展示素材库中的素材,我们放宽了搜寻时的精度。这也是您偶尔会在“书法”的关键词搜寻页面下看到“人”或“水果”等素材的原因。如果您反感此类搜寻结果,则可以利用同样位于精致化搜寻栏中的【排除关键字】,对那些不希望看到的内容进行排除。在上述的情况下,只要您排除“人”、“水果”的关键词,就能够以更高的精度进行有针对性的书法素材搜寻。本功能支持同时排除复数个关键字/词。不过要记得用逗号将这些次隔开喔。
按颜色搜寻
通常情况下,颜色对于向量图搜寻的帮助程度并没有想像中那么大----毕竟人类社会中的大部分物件都是可以染色的。但是,对于搜寻书法类别时,则并非如此绝对(甚至可以说非常有用)。毕竟一部分的书法毛色甚至是固定的。通过颜色搜寻,可以很轻易的限制搜寻结果的展示范围。除此以外,在为与文章或网站寻找颜色相称的书法插图/向量图时,您同样可以使用此功能。
按人数搜寻
虽然说人也是书法的一员,但在illustAC中,以人为主体的免费插图/向量图大多被分类于“全家福”类别。在这种设定之下,在书法类别中试图按人数搜寻就显得非常无趣。但凡事也并无绝对。比如说,如果您希望找到表现“人与自然和谐相处”的书法素材,就可以在将精致化搜寻栏中的【模特儿人数】设定为1的情况下搜寻。此时,您大概率会看到人与书法共存的插图/向量图。诸如此类,在某些特定情况下,按人数搜寻能帮助您快速缩小搜寻范围。
寻找类似
寻找类似插图/向量图是在illustAC中执行搜寻时必定自动执行的一部分。该功能又会根据介面的不同分为两类。
- 当您尝试从搜寻结果页面查看时,寻找类似功能将会从向量插图图库illustAC以及剪影图库silhouetteAC中寻找书法素材。此时,尽管类似向量图的种类会发生变化(即插图和剪影),但换个角度想,这些全新的素材类别也为您提供了更多的选择空间。
- 而当您试图寻找同一种类的免费插图/向量图时,您只需要点击希望成为查找对象的向量图即可。该功能是通过ACworks的另一项技术----以图搜图自动完成的。通过点击特定的插图/向量图,页面将会跳转到您选择的向量图的下载页,同时在该向量图的标签下方,会出现向量图结构、内容类似的插图/向量图。这些插图/向量图当中有些来自于统一摄影师,而有些不是。构图相似而风格迥异的免版税插图/向量图也有可能成为启发您的创造性的关键。如果您暂时找不到完美的插图,不如点开最接近理想状态的一份向量图。说不定里面就包含着更精彩的推荐!
4. 免费向量图编辑
想编辑向量图,但手头设备里没有图像编辑器?觉得编辑时找到的书法素材还得先下载再导入才能编辑很麻烦?在illustAC,您不会有机会体验这样的烦恼!对于每张插图/向量图,我们都设置有编辑按钮。哪怕不进入各图的下载界面,您也可以通过点击光标悬浮于插图/向量图上方时出现的编辑按钮,并在选择好希望编辑的尺寸后,自动跳转到ACworks的免费图像编辑器designAC(有正体中文版本)。跳转完成后,您无需执行任何额外操作,被选择的素材将会被自动加载于画布上,供您直接编辑。小到向量图反转/对齐、按形状裁剪、添加文字,大到绘制图表,多人合作编辑,各种图像处理的必需功能应有尽有。并且最重要的一点:这些都是免费的!
5. 向量图的使用目的/许可范围
如果您喜欢当前的书法类别下的插图/向量图或向量图,您完全可以免费下载。为了适应不同的使用目的,我们为您准备了JPG、PNG以及AI/EPS类型的不同档案格式供您选择。在下载前,您需要首先完成免费帐号的注册和登入。在实际使用时,您不需要引用出处,并且可用于商业专案。因此,您完全可以将心仪的高质量、免版税的插图/向量图用于传单/海报等印刷品、网站建设、电商广告、或电视节目的制作上!
还没成为普通会员的使用者们,真的不来illustAC免费注册看看么?
Definition of brushes in Illustrator
Brushes in Illustrator are defined as the objects that you color with or register to other things as strokes. Brushes are the particular part of art that, if registered to strokes, looks to be like traditional brush strokes. They are also used to register artwork in recreating or dispersed designs along a path. You can also use a paintbrush tool to try sketching with brushes. Brushes are helpful because they are not restricted to the brush tool's directions. You can choose any chosen way to register a brush.
There are various types of free illustration brushes provided by illustAC. illustAC has offered high-quality thousands of free illustrator brushes, and the download process is also way too easy. Therefore, if you search for high-quality free illustrator brushes, then illustAC is your destiny. It's a trustworthy site; as you can see, 7756500 people are using it, and the total premier members are about 95150 people.
Different types of illustrator brushes
Illustrator has five different types of brushes. illustAC is the right place to get high quality, royalty-free illustrator brushes, and it is trusted by many users, which shows their authenticity, artists outstanding performance, etc.
Scatter Brushes: The scatter brushes obtain the available vector art and spread it across a path. Brushes like these create natural textures like grunge brushes or sponges. illustAC is the right place to get free illustrator brushes within seconds or minutes as you desire.
Calligraphic Brushes: These brushes were planned to copy the look of brushes and pens. This kind of brush works for hand-lettering in Illustrator.
Pattern Brushes: The pattern brush allows you to manage every angle's working, including corner angles and the right and left ending point. If you cannot find correct free illustrator brushes, then illustAC is your answer. The download process is also way too easy. A search filter is also available to search for their desired shapes, sizes, or colors of free Illustrator brushes vectors.
Art Brushes: Art brushes contain a vector and enlarge it across a line. These brushes work well for watercolor brushes, pencil brushes, pen brushes, etc. But if they are expanded or flattened too much, you can get unsteady outcomes.
Free illustrator brushes on illustAC
If you are searching for eye-catching free illustrator brushes, then illustAC is the right place for you. illustAC is a part of AC works specially made for those designers and illustrators who love working with flat illustrations, vectors templates, or clipart to download and share their work. illustAC have about seven million registered users to date, and every day, their users are increasing.
illustAC provides hundreds of free illustrator brushes and has search filters available. You can get the required shapes, sizes, and colors free from Illustrator brushes through search filters within seconds or minutes. Some of the most popular free illustrator brushes of ilustAC are:
Scatter Brush illustrator
Scatter brushes are instinctively named. They scatter a pattern with a path. Thinking about a leaf-blower being pushed across a lawn gives you a sense of the chaos you can make using a scatter brush stroke to make the path of objects. To date, illustAC has provided about 23 free illustrator brushes to download.
Hair Brush illustrator
Currently, illustAC provides about 127 free hair illustrator brushes. Since illustAC is trusted by millions of its users today, if you search for free Illustrator brushes, don't doubt and look at illustAC—various illustrator brushes like a hairbrush, floral brush, paintbrush, etc.
Paintbrush illustrator
illustAC offers more than eight hundred paintbrush illustrators for free. They also have a search filter to get the required shapes, sizes, and colors of paintbrushes illustrators you want. For downloading any paintbrush illustrations for free, click the picture and see the download button. To make your design look better and if you don't know where to get the free illustrator brushes, illustAC is your answer.
Marker Brushes
Grab yourself an unfastened set of the following marker illustrator brushes. With the availability of various textures, this straightforward yet varied set will help you personalize your layout down correctly the way you need it to be. Authentically sourced from pens, free illustrator brushes ramify nib styles and sizes, from thin outlining strokes to a little thicker.
With a simple one-click on, you can give your clean and crisp vector paths the advent of a homemade doodle with the subtle irregularities produced with the aid of ink bleeding into the paper. Besides this, illustAC allows you to choose from, inclusive of brief, long, alternative, and messy strokes. You should follow the brush to any route created with the brush tool, Pencil, or Pen tool, and easily exchange the scale with the aid of changing the stroke weight to switching the stroke weight to know the correct line style.
Shading Brushes
You can provide an old carved and engraved appearance with the help of shaving brushes that are hand-drawn line patterns in horizontal, vertical, diagonal, and cross-hatched orientations that are used to shade your digital drawings. Once they are scanned from handmade pen strokes, they have been processed into free illustrator brushes that perfectly repeat along paths of any period without stretching or deforming. Now open the brushes file from the brushes panel menu into Illustrator and choose 'Load Brushes.
If you want to exchange the brush's dimensions, adjust the stroke weight to increase in size or grow. The brush stroke will possibly expand past the desired shading place. One appeals to trim to create it to measure with the aid of drawing a full shape and setting to make the extra quantities invisible as a clipping mask. Another way of protecting the method is by adding an Opacity Mask to the course, then painting over the unwanted areas to hide the excess with a Blob brush.
Multi-Colored Paintbrush
You can download the illustrator files by clicking on the images and opening them in Illustrator. Use your Brush tool(B) to create attractive shapes and choose the brush you want from the brush panel. For different and unexpected results, try to scale the stroke of the brushes. You can also save the brushes for later use so that you don't need to open the Illustrator file every time, and it saves your time and effort. For storing, click the left pop-up menu of the Brush panel and select the Brush libraries menu> Save Brushes. Also, name your brushes on the brand-new report, click on the pop-up menu and choose the store's settings according to your choice.
Linocut Brushes
Authentic linocut and woodcut illustrations need a ramification of specific tools, endurance, and skill. Still, there's a way to produce fun and interesting similar artworks patterns but with the protection internet of the Undo button. illustAC provides you with high-quality royalty-free illustration brushes.
To construct your illustrations with sensible techniques, pick out brush shapes like tapered shapes, texture fills, and edges shading but in no time and without the unfulfillment of making any mistake. The other way is to open the document will appear the series of paths with each brush already applied, which can also be copied into another document to switch into the Brushes panel from the brushes. You can use the brush tool to modify your drawing paths from the library by choosing a brush style. The dimension of the brush can be modified using the stroke weight.
Dry Brush Strokes
Dry brush strokes help develop distressed designs with a handmade look. You can download this free set of vector free illustrator brushes from illustAC. Each brush stroke is used for two purposes, like a standalone graphic to your designs or made with the brush or pencil tool that features the rough texturing in your artwork.
They have been made utilizing painting wispy strokes with a paintbrush, and then the outcomes are scanned and vectorized to make valuable vector resources. Those kinds of brushes are used chiefly for developing authentic hand-painted consequences on your artwork. To fast freehand textured highlights and shadows to your illustrations, notice them with the brush tool.
How to create brushes in Illustrator?
Being a digital artist, you might constantly search for new ways of visually enhancing your illustrators; one of the most used methods is applying textures through brushes.
As we speak, there are more than thousands of brush packs available out there, but what if you find yourself where you have to create one of your own?
Well, the process of making custom brushes in Illustrator can sometimes be a real challenge and will require you to think differently outside of the box since there are multiple methods of achieving the same result. Remember that you will find a great selection of vector brush sets to pick for free illustrator brushes from illustAC. The ways of creating your brushes in Illustrator are as mentioned below:
- Make any shape into a brush that you want by opening a new illustrator document. You don't need to worry about the figures at this point because once you try this a few times, you'll have an idea about what shape your brush should be like.
- Illustrator brushes are not the same as watercolor brushes, and these are used to make different tiny shapes, drawings, or other artwork from scratch. At the same time, illustrator brushes illustrate almost anything in various artworks, like displaying a text or drawing in poster designs. Select all the shapes that you want your brush to be. Then, click on the little arrow present in the upper left in your brushes palette and select 'New Brush'.
- After that, you will see the option to choose from four brush types. Choose 'Art Brush' and click ok.
To get the perfect stroke that you want, you need to decide the direction of a brush. You can create various custom brushes to help yourself in your work. You can also flip the brush horizontally or vertically to flip the stroke that it produces.
- Now, you are in the brush options. Note: Make sure you choose 'Tints' as the colorization method. This method permits you to change the brush's colour like a stroke color. Otherwise, your brush will always have the same color as you created it. Now, choose your settings and click ok.
- Now, you should see your custom brushes in the Brushes palette.
You need to create any shape you want to test your brush. Be confident that you have the stroke selected in the tools palette, and click on your custom brush in the Brushes palette to apply it in the shape you just created to see what you get. Custom brushes make it easy to get forms; otherwise, it will take hours to draw by hand. You can start using it whenever you like because you have created your meeting. Just adjust the stroke size to get the suitable effect/shapes.
How to use brushes effectively?
There are different ways to use your illustrator brushes. You can also use the paintbrush tool to draw an applied path and apply your brush to a current approach. Follow the following methods to use your illustrator brushes:
Using the Paintbrush Tool
- Step 1: Go to File, New. And, name this file as 'Brushes or Brush', also set any size you want for the document and then click ok.
- Step 2: Select any bruh your heart wants in the 'Distressed Ink Strokes' brush panel ( I would like to use the first one named 'Distressed Ink Strokes 1').
- Step 3: Choose the Paintbrush(B) in the Tools panel and start painting anything you want over the canvas. Now, you can see all the brush strokes you do will have the 'Distressed Ink Strokes 1' style applied.
Using the Pen Tool
- Step 1: In a new document( I will use the same one we did just before this), select the Pen Tool(P) and draw any path(or paths) that you want.
- Step 2: Go to Select(All).
- Step 3: From the 'Distressed Ink Strokes' brush panel, click on any brush you want( I will use the third one named 'Distressed Ink Strokes 3), and you will see the brush style we chose is quickly applied to all our selected paths.
Using the Shape Tool
- Step 1: In a new document( I will use the same one we did already), select the Ellipse Tool(L) and draw a circle.
- Step 2: With the Circle shape you just selected, choose any available brushes inside the 'Distressed Inkl Strokes' brush panel and click on that( I will use the one named 'Distressed Ink Strokes 14).
Changing brush shape and color
Changing brush shape and color is an easy task, and you need to follow some steps, and it's done.
- Step 1. Let's think we just completed star shape, so either using the Pen Tool, the Star Tool or even the Paintbrush Tool, and we applied the 'Distressed Ink Stroked 8' from our a few minutes earlier loaded Brush Library to it using the default setting:1 pt stroke and black color.
- Step 2: After selecting the star shape, go to Window> Stroke.
- Step 3. Set the stroke weight you want to apply to the shape( I will emphasise 1,5 pt to make it look bigger).
- Step 4: With the shape still selected, go to Window> Color.
- Step 5. Be sure that you have the stroke color active, and set any color you require or want.










 © 2011 - 2025 ACworks Co.,Ltd. 版权所有。
